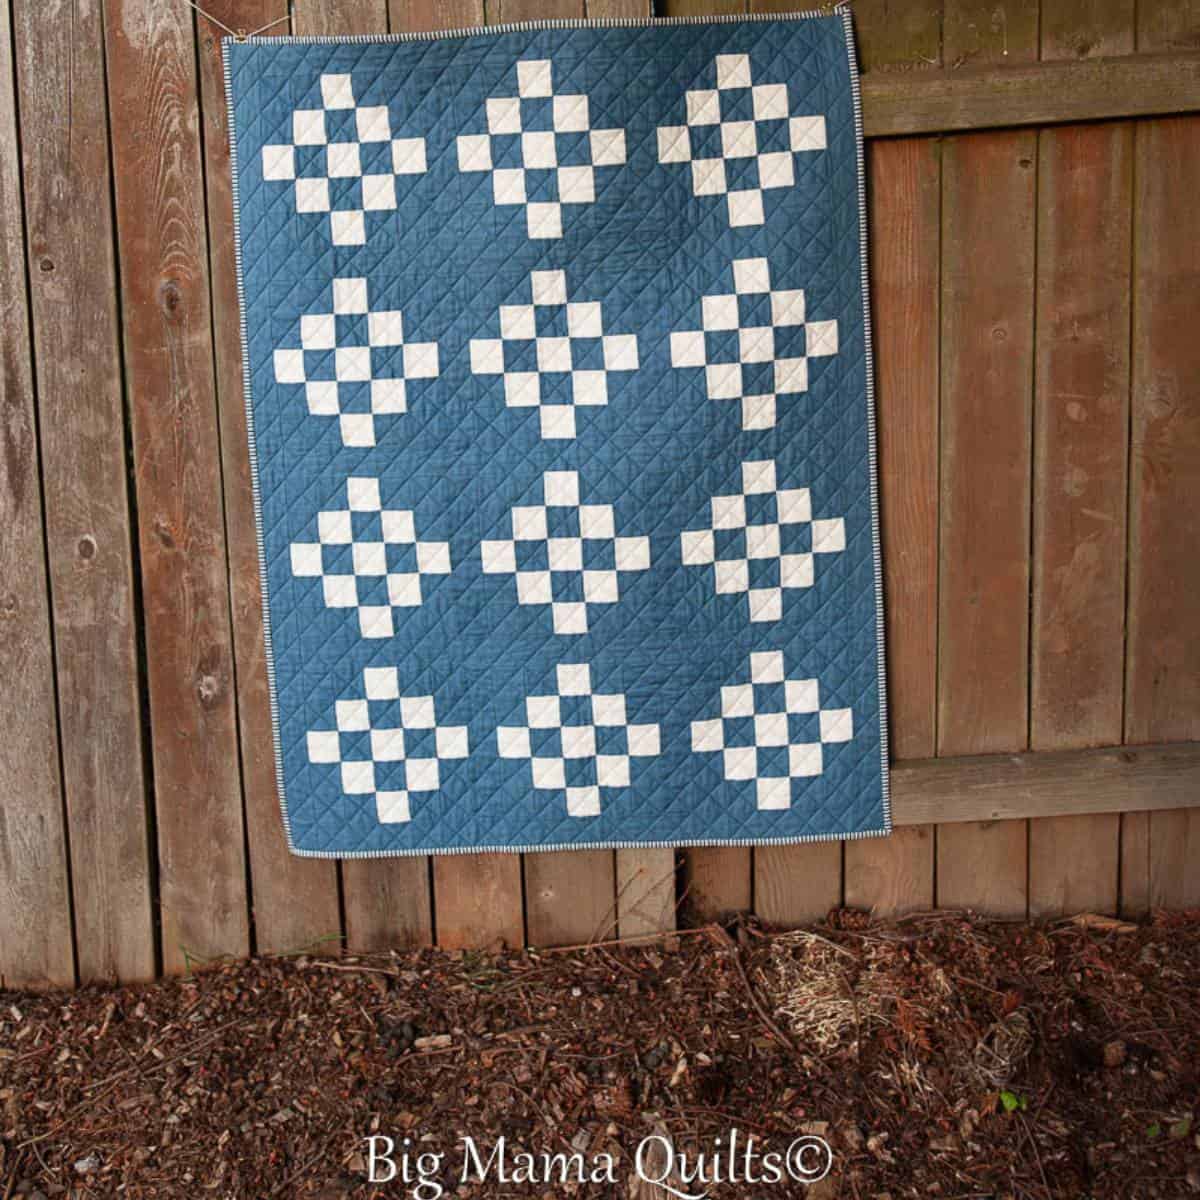
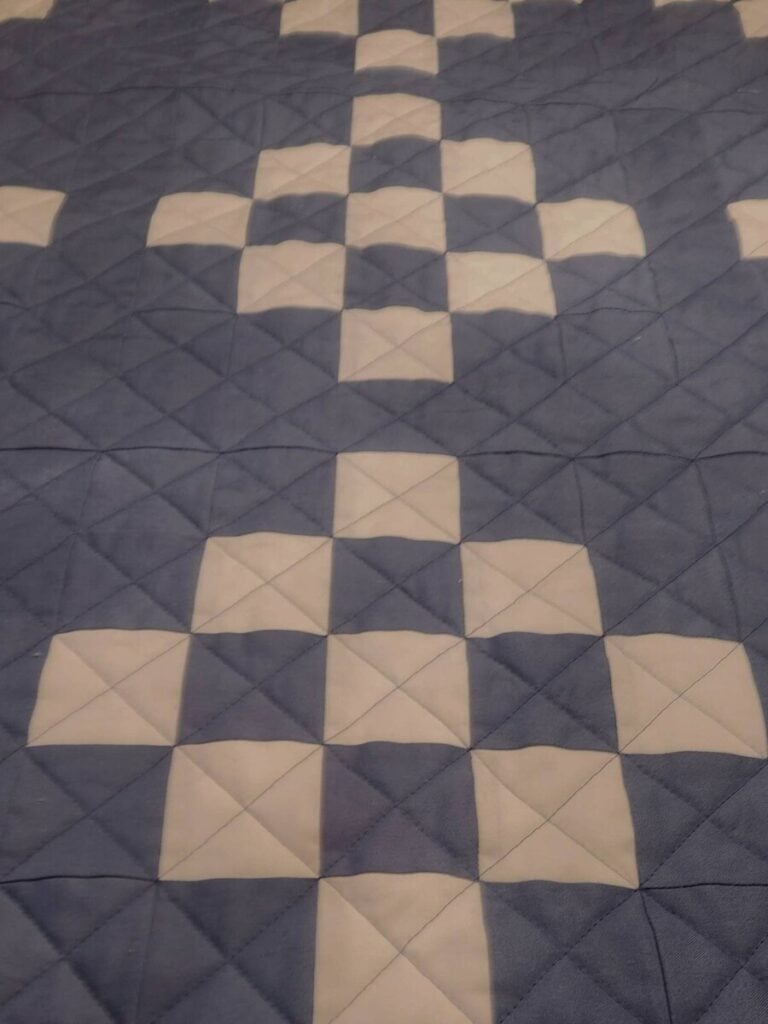
A classic 25-patch baby quilt with a modern twist
The James Quilt, a gentleman jubilee, a 25-patch quilt block with a modern twist for a sweet baby boy. We learned last October my brother and sister-in-law were expecting their first baby. In January, a shift occurred in my world. Suddenly, I had small pockets of time to sew again. Baby quilts are a great project for a busy spring schedule. They do not require much fabric and can be quick to finish. Simple quilts have a familiarity with them like riding a bike, and tend to help with mental fatigue. A quick and satisfying finish is just what my busy schedule and brain needed after so many years of not quilting.
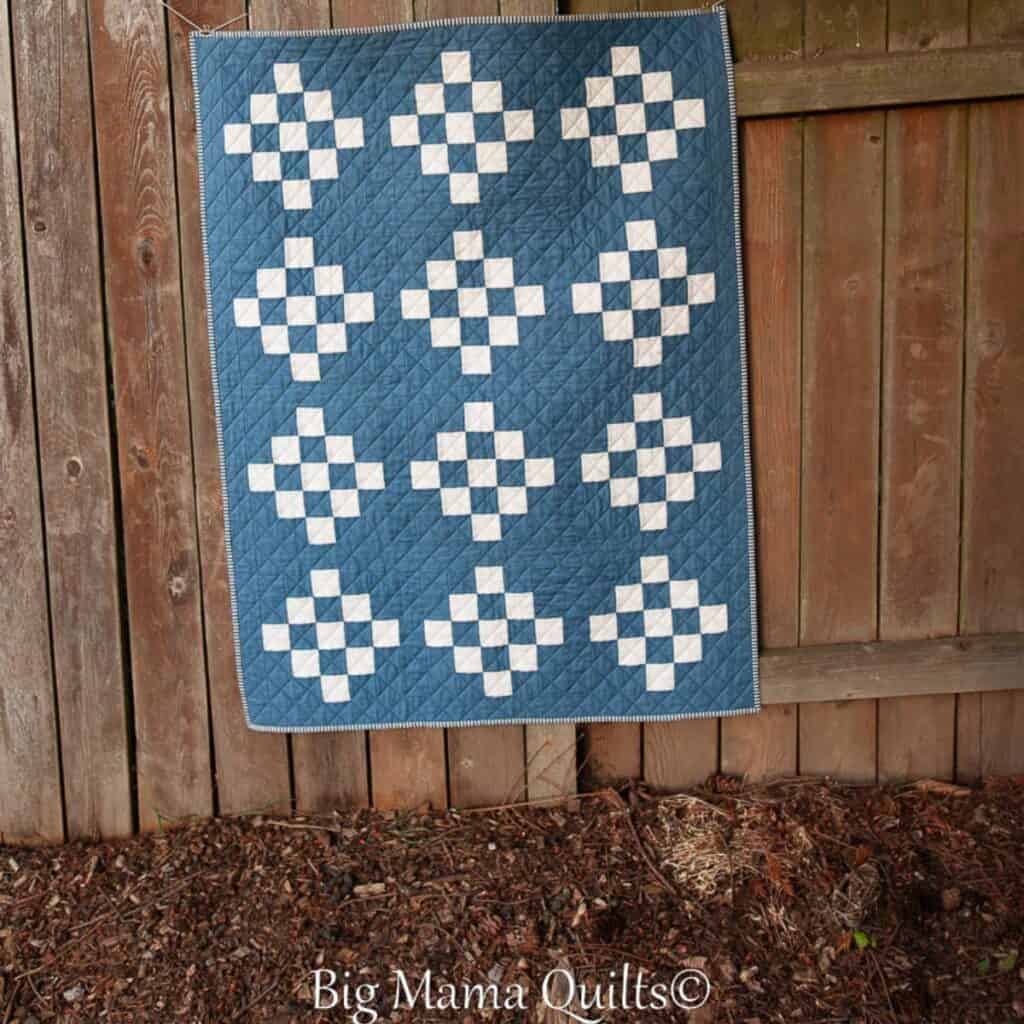
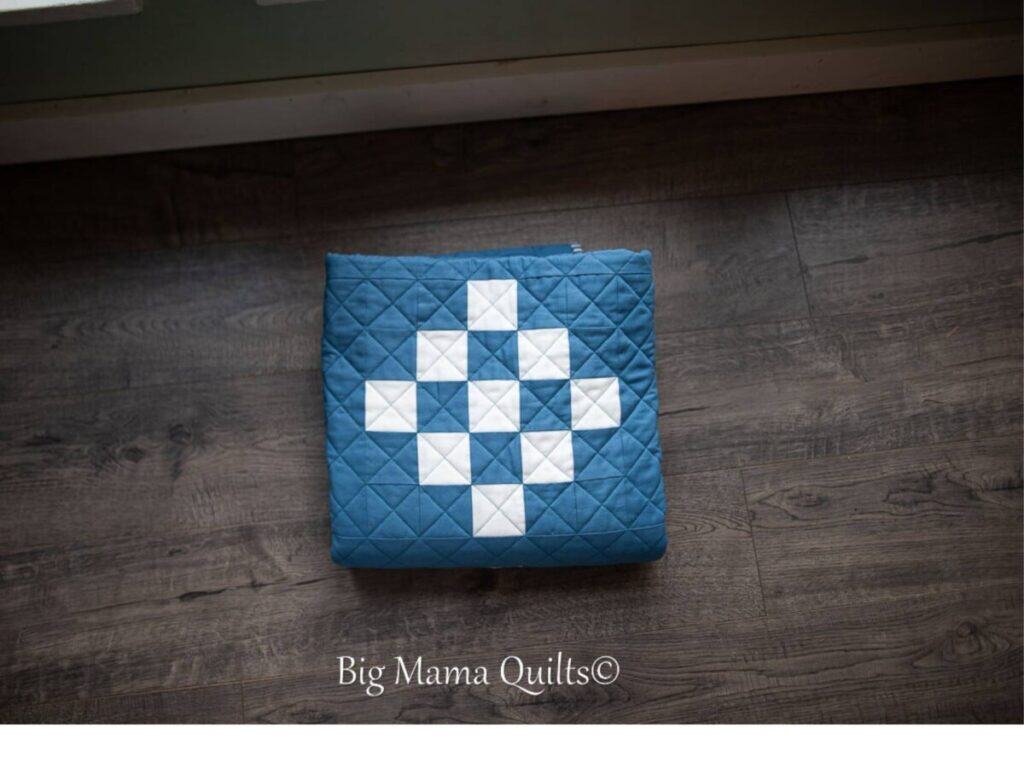
I knew this baby would never get a GG blanket. My desire to pick up where GG left off runs deep these days. A quilt, not a blanket made like hundreds of others on a shelf, is a one-of-a-kind piece of our heart sewn together one stitch at a time. Knowing my sister-in-law would appreciate a classic and timeless quilt, I settled on my favorite 25-patch checkerboard quilt block, a twist on the Irish Chain quilt.
I searched through my fabric stash and found exactly what I was looking for, smoky blue and a greyish white fabric. The James quilt, a quilt of 25-patch blocks, a Gentleman Jubilee, was starting to come together
Create Ordinary Beauty
Classic Irish Chain quilts are based on this 25-patch quilt block. The 25-patch block is a 5×5 grid of 5 rows of 5 squares. Alternating lights and darks, the design possibilities are endless while the construction is still simple. Pre-cuts, jelly rolls, layer cakes, and fat quarters are ideal for this block. Charm packs for fussy cutting add just a bit of interest to the 2.5″ squares.
Are you ready to sew a 25-patch quilt? Join me at my sewing table.
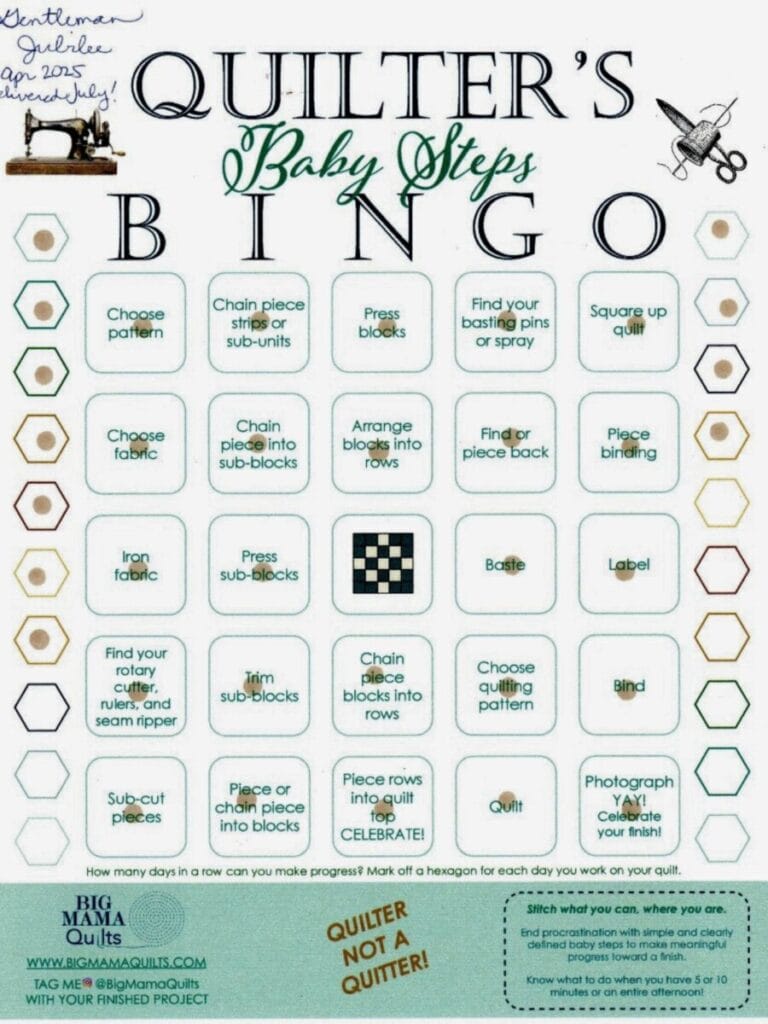
Get your bingo card ready, we will sew this in baby steps.
I begin every quilt by sketching my idea on graph paper. It helps me to work out the quilt math. Next, I find a color palette I like to match the vision in my head.
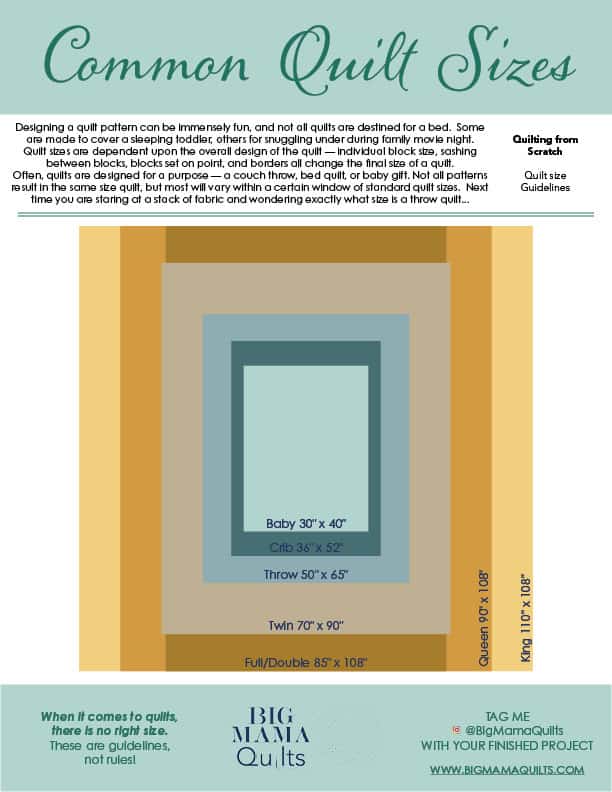
The James quilt finished at 38” x 50”, perfect for a crib and a toddler bed.
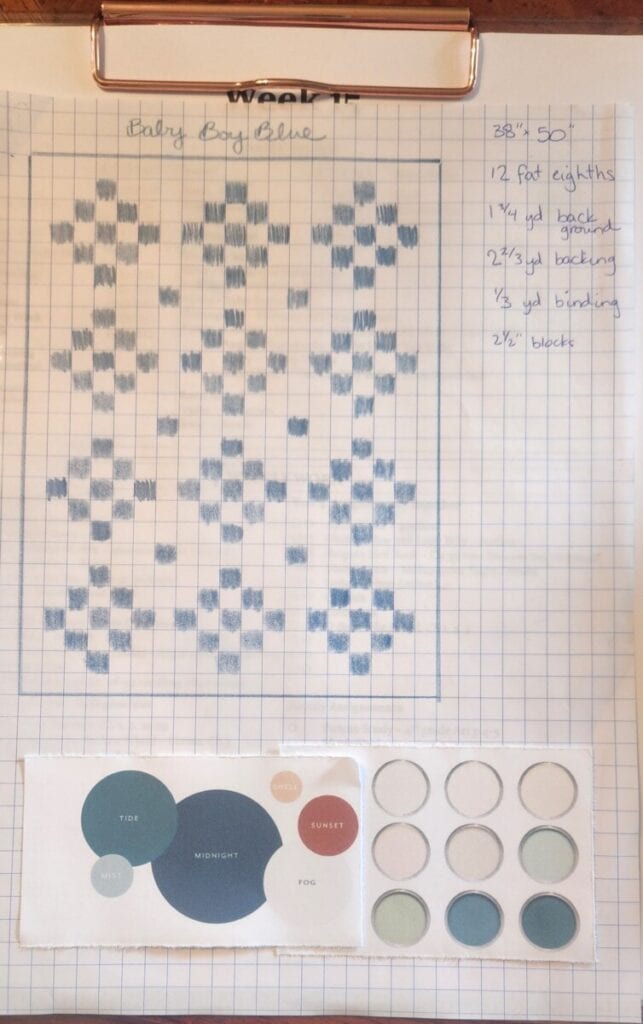
The pattern, depending on how scrappy you want your quilt to be, is as versatile as the fabric you have on hand. My version, in a classic two color quilt, needed more background fabric than main color fabric.
Fabric Requirements and the Quilt Math:
The blocks are 10.5” x 10.5” unfinished. This pattern is perfect for jelly rolls. A jelly roll is a roll of fabric pre-cut into 2.5″ strips. Often containing an entire line of fabric, jelly rolls are also sold in solid colors.
The sashing strips are 2½″ x 10½″
The border strips are 2½″ x 34½″ and 2½″ x 50”
Main color:
We need 114: 2½″ squares:
- 7 strips 2½″ x 42” (from a jelly roll) or 14 strips 2½″ x 21” (from a fat quarter)
Background color:
192 of 2½″ squares
- 12 strips 2½″ x42” (from a jelly roll) or 23 strips 2½″ x21″ (from a fat quarter)
17 of 2½″ x10½″ sashing strips
- 5 strips 2½″ x10½″ (from a jelly roll) or 9 strips 2½″ x10½″ (from a fat quarter)
I ended up with far more blue than grey in my fabric stash, so I reversed my pattern from the sketch. I also found a large scrap, large enough to cut borders. As a result, I decided against the cornerstones.
A note about cutting fabric.
The finished quilt will only look as good as the pieces going into it. A quilt like this, with many seams that need to be accurate for the blocks to line up, will only be as accurate as the fabric squares going into it. The more accurate and precise the squares, the more accurate the finished quilt will be.
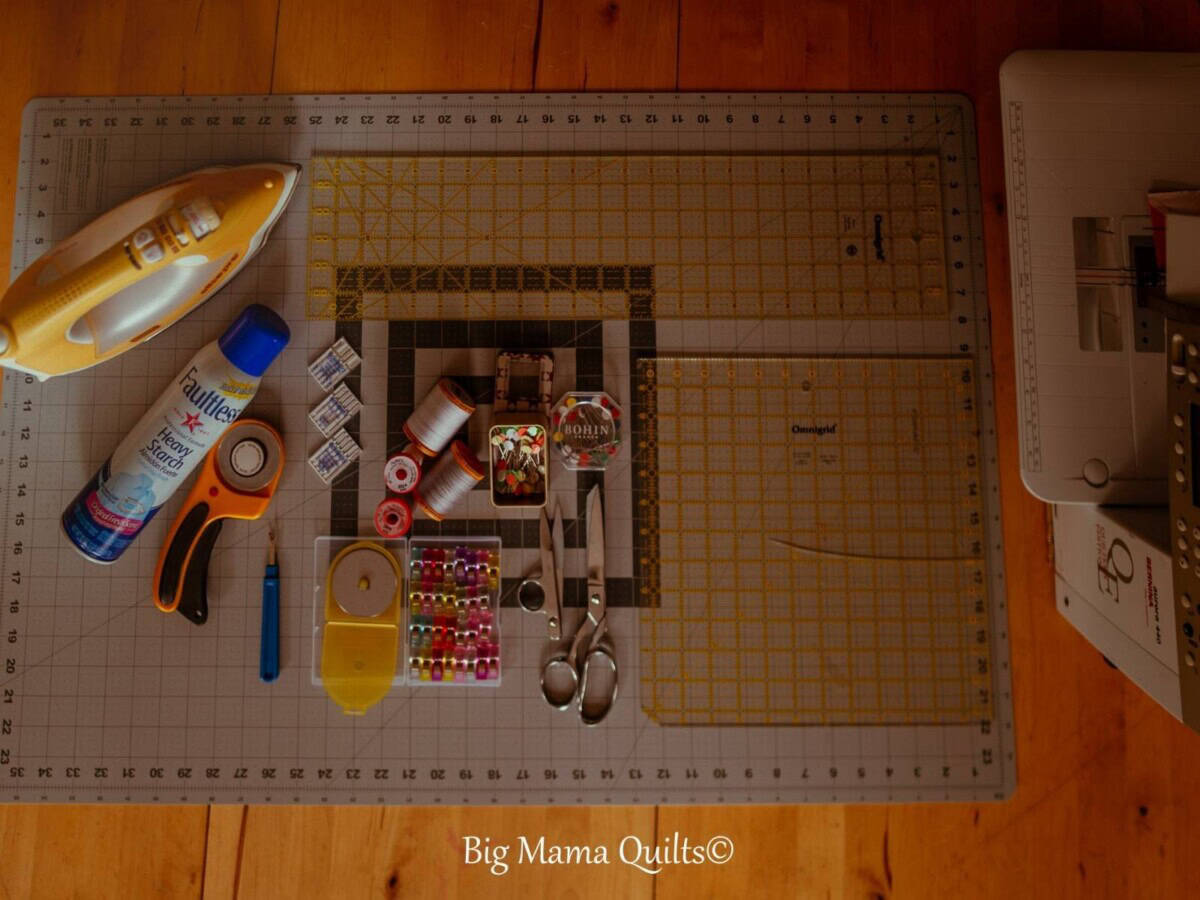
How to cut the pieces accurately? Starch before cutting.
Spray starch stiffens the fabric, making it easier to cut. It also shrinks the fabric a bit. If you starch after cutting, the moisture from the starch can shrink the cotton a bit, and all the pieces may not shrink the same. Misting the fabric with starch and letting the mist dry before pressing gives nice, crisp cut pieces to work with. Ordinary, everyday satisfaction – cutting crisp fabric. Have you ever tried to cut construction paper and tissue paper? The construction paper is easier to cut, just like starched fabric. I prefer Faultless starch found at my grocery store. It was good enough for my mom to use on my dad’s uniform shirts. It’s good enough for me. Specialty starches are sold at quilt shops and online, but I happen to love what I can buy at the grocery store.
Spray the starch, let it dry. Once dry, then press with your iron. Do not iron back and forth. Ironing strips like a shirt or pants may distort the fabric.
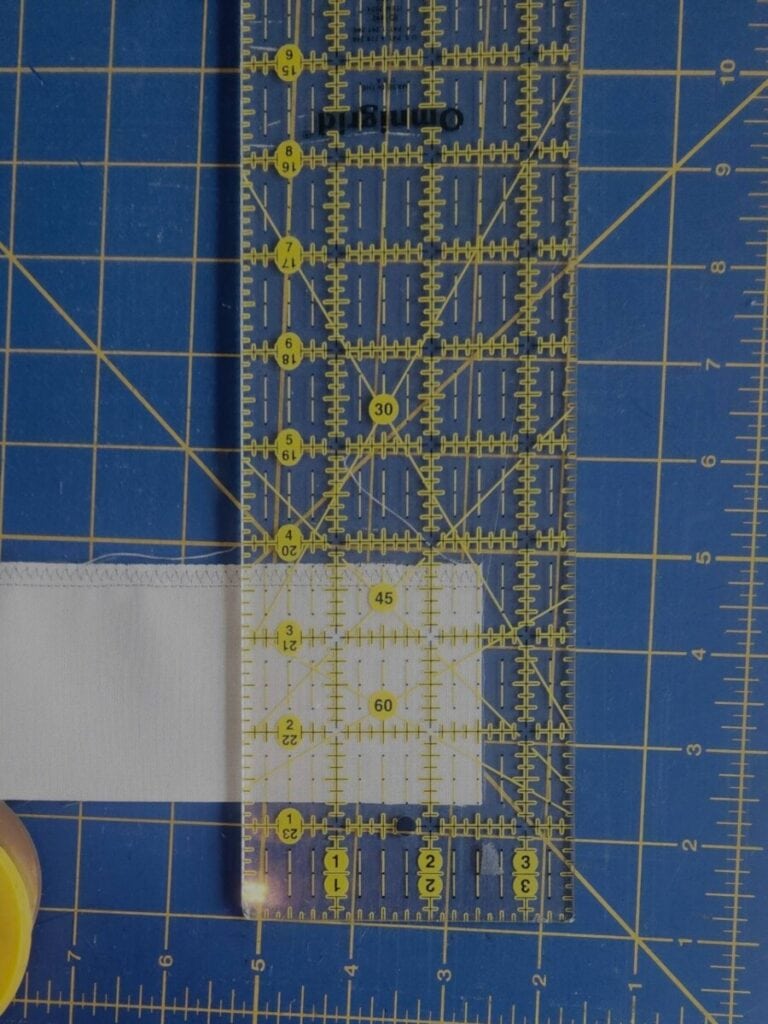
Precise and accurate cutting.
Use the lines on your ruler, not the lines on your mat. Use a rotary cutter with a sharp blade. Start by squaring your jelly roll or fat quarter. Lay the long ruler over the fabric, lining up a straight line on the ruler with the bottom edge of your fabric. Using the rotary cutter, trim the uneven edge off, creating a straight edge at a 90 degree angle to the selvage edge.
Begin cutting your strips and squares from this freshly cut straight edge.
Let’s begin with strip piecing.
Strip piecing will help keep your block pieces orderly and increase the accuracy of each block. Sew your strip sets together with a ¼” seam allowance. The seam allowance needs to be consistent across all the pieces for them to align to the other pieces. Press with the seam facing the darker fabric, in this quilt to the blue side.
Sub cut your strip sets into 2.5” x 4.5” rectangles.
Staging the pieces in the order of sewing helps me reduce the number of pieces I sew incorrectly.
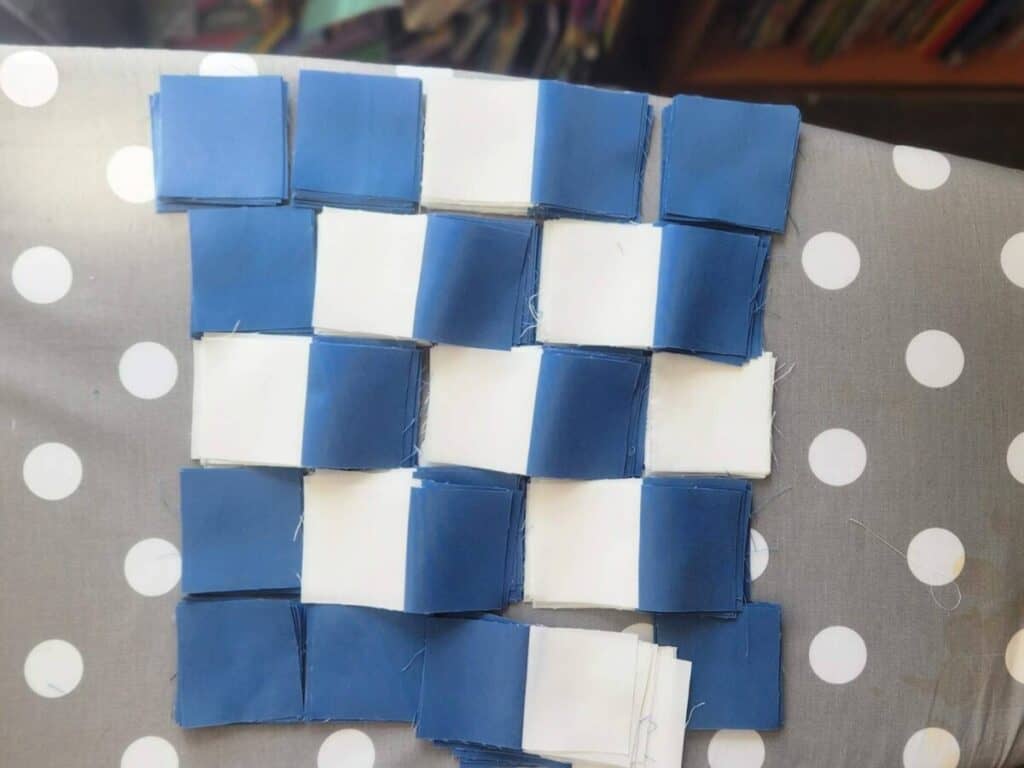
Sew the quilt blocks
Sew the squares and strip pieced sets together into rows according to the setting above. Press the seams toward the darker fabric. This will give you 5 rows of 2 1/2″ squares.
Now sew the rows together to assemble your 25-patch blocks. Press the seams in one direction. You should now have a 25-patch quilt block. Repeat the above steps for each block.
Attach sashing strips to the bottom of the blocks, except for the 3 blocks at the very bottom of the quilt. Press the seams toward the sashing blocks. This will help the seams in the block lay flat.
Attach the corner stone blocks to the remaining sashing strips. Press the seams toward the darker fabric. To each side of the four blocks, sew the sashing strips with cornerstones. Nesting your seams will help the sashing strips line up with the blocks. Press the seams toward the sashing fabric. These will be the blocks in the middle column.
Sew the rows of quilt blocks
Sew the blocks together into rows following the sketch diagram. Press all the seams toward the sashing to help the blocks lay flat.
Sew the rows together. Again pressing the seams toward the sashing.
Attach the border to the top and bottom of the quilt, pressing the seams toward the borders.
Attach the final two borders along the edges of the quilt. Pressing the seams toward the border.
YAY! Check your bingo card, you have finished the quilt top! Celebrate.
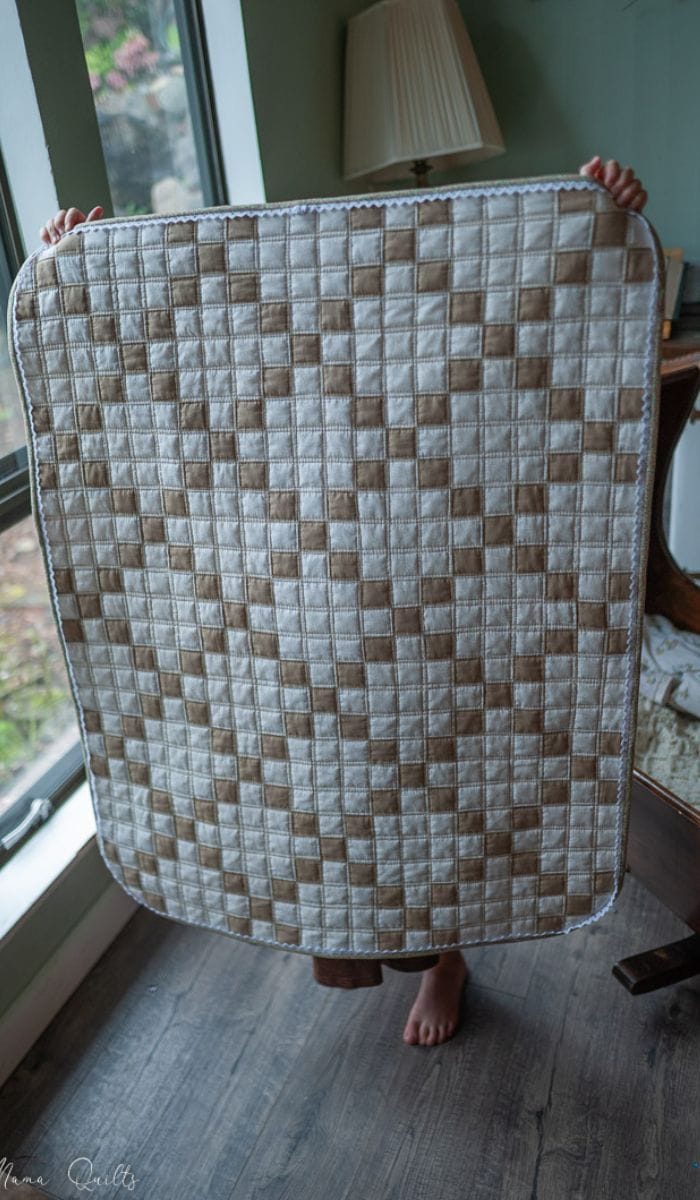
Backing the Quilt with a Twin Size Sheet
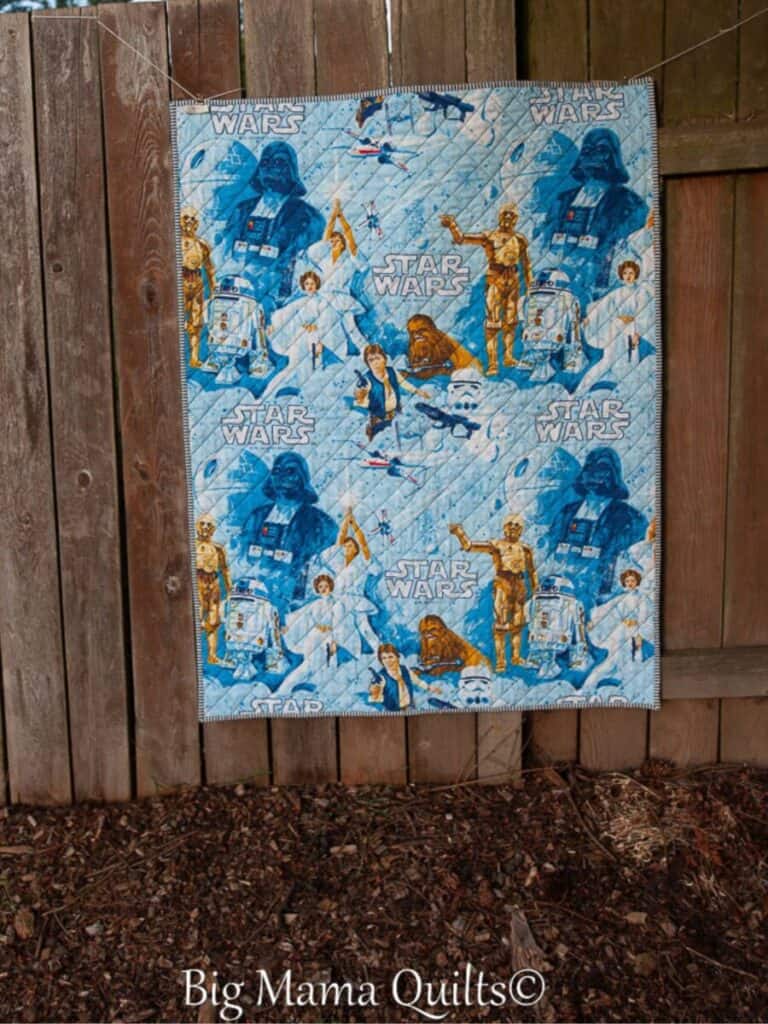
My brother loves Star Wars. I always thought he would outgrow it. I distinctly remember Star Wars sheets on his bed as a child. When dreaming of this quilt and how much I adore my sister-in-law, I knew Star Wars would not be the focus. Chewie and C3PO would need to take a back seat. I found a vintage sheet for a perfect backing!
A note about sheets as quilt backs. The tight weave, high thread count, and lack of natural fibers in sheets usually make them not ideal for quilt backs. The high thread count makes the fabric too dense for my home machine to quilt through. The synthetic fibers shrink differently from the 100% cotton quilting cottons on the front of the quilt. This twin sheet is from the early 80s, so it’s 80% cotton and has a normal thread count. It was perfect!
Quilting
I quilted in a simple cross hatching that I knew would secure it for multiple washings. I did not want this quilt to sit on a shelf looking pretty, but to be used for many nights of lots of cuddles, as a fort, and dragged around.
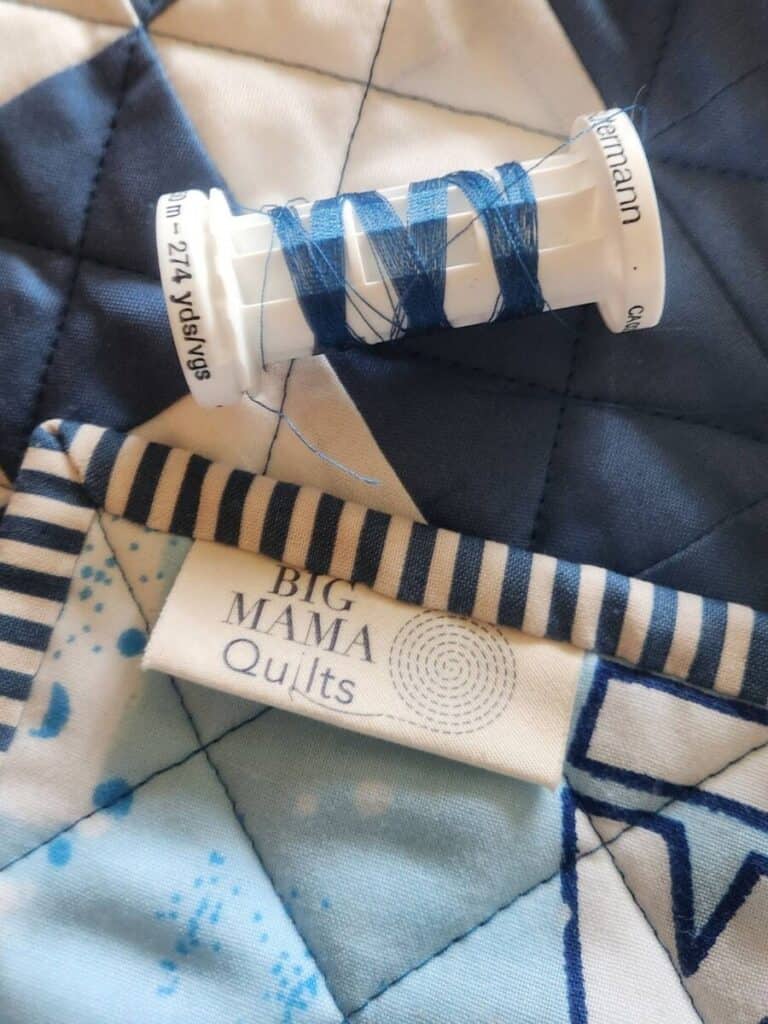
Finish the Edges with a fun binding
I love stripe bindings almost as much as I love gingham backgrounds. That quilt is sitting nearby, waiting for its turn.
An old fashioned Elmer’s glue stick is the key to matching stripes on a binding. Just a dab where you want the stripes to line up before you sew keeps the layers from shifting out of place.

I always stitch my binding to the front by machine and hand sew it to the back. I do not like the look of binding attached by machine on both sides. I much prefer the invisible look of the stitches that hand sewing gives. Plus, I love to sew by hand. I spend a lot of time at sports practices and at the park. Hand sewing keeps my hands and mind busy.
A sweet and simple, classic baby quilt that comes together quickly, perfect for gift giving!